


I thought these were so cute!!! So I made one for our grand baby for her birthday in September! I got the idea to do one of these from Judy over at Pieces of Me
I had seen them before but I never paid attention to how simple and fun they are to make, and it isn't a long drawn out process. They are fairly quick and easy. I love those kinds of projects! And I love seeing quick results, and something so cute!!
Fleece two different patterns, one printed, one solid which compliments the printed one, or two patterned ones, totally up to you.
Straight Pins
Ruler
Scissors

Lay out your fleece so it's smooth.(hopefully you have someplace big enough to spread it out, I used my dining room table) Place one piece on top the other so the edges are lined up. Making sure that the "right side" is facing out on each piece. Line them up as best as you can. You might have to trim a little off if its to crooked. Having a little extra on one side is okay. I just try to make it even all the way around.

I didn't/don't cut of the lettering on the side, you can if you want to, its totally up to you :) its just an extra step and it looks fine when its done.
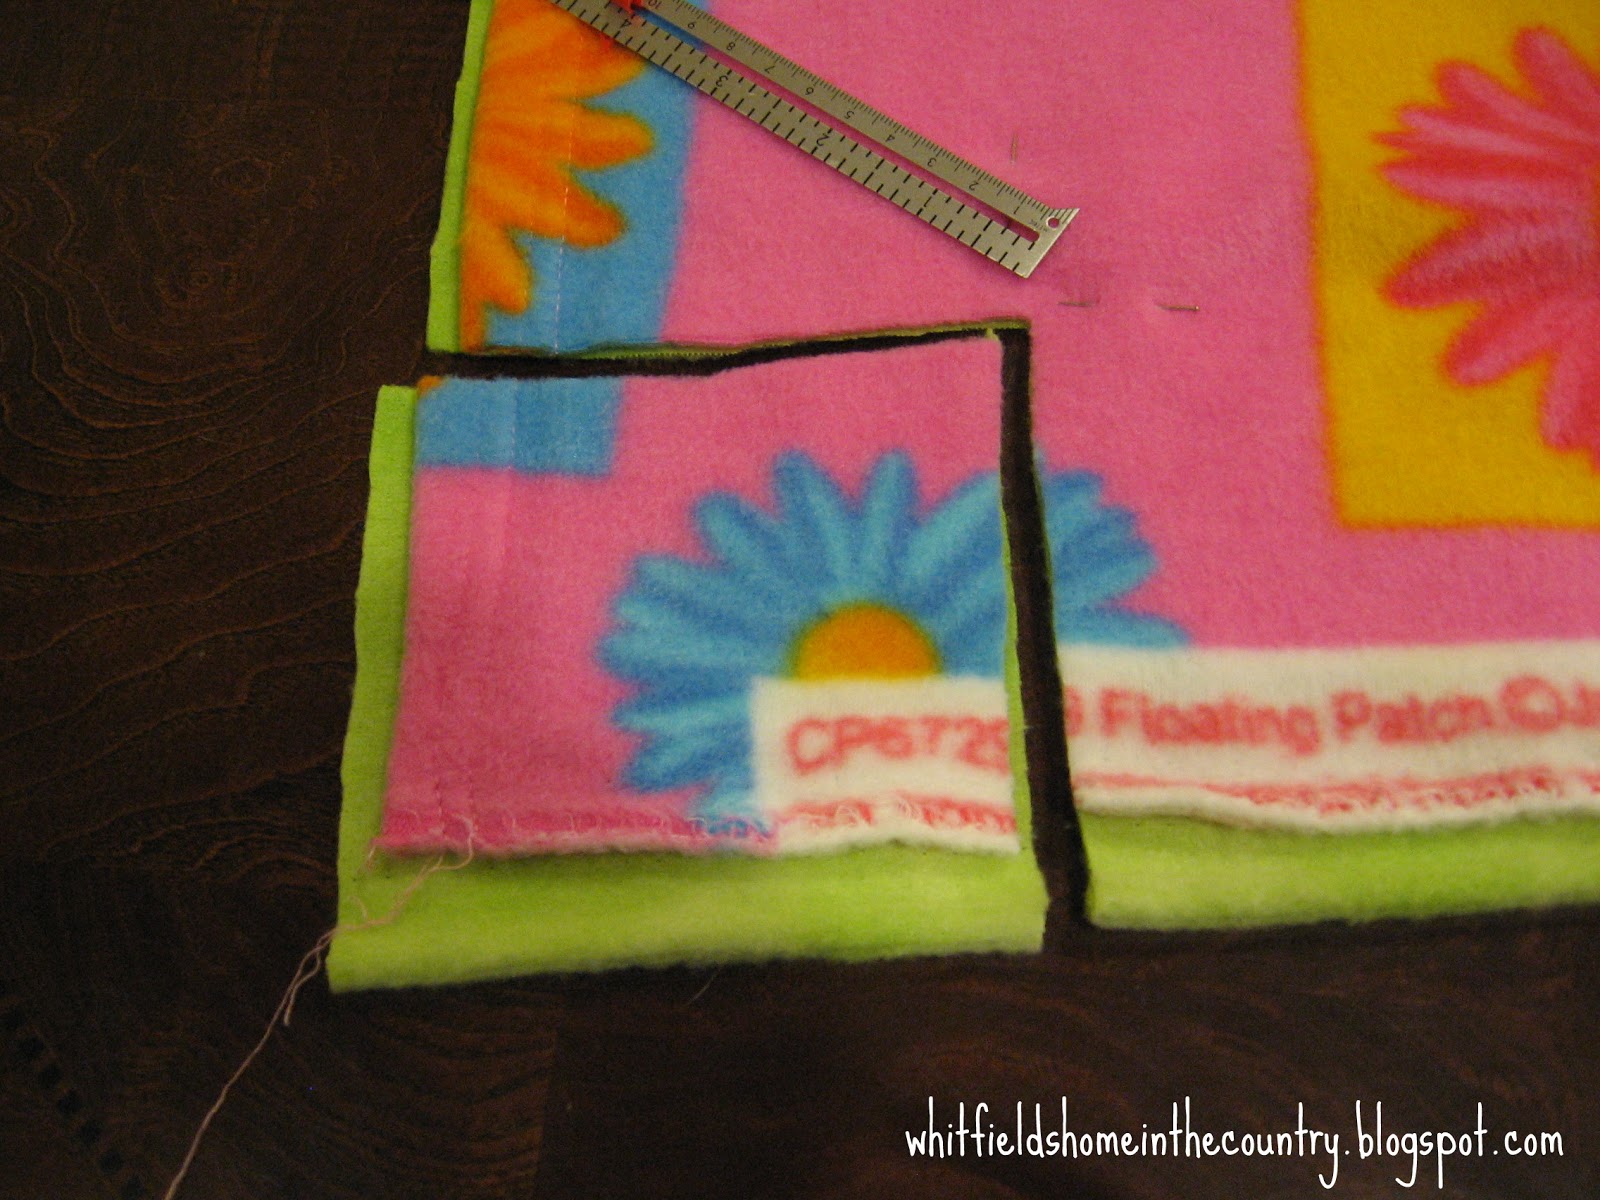
Once its all smooth and where you want it, measure and pin 4 inches all the way around.

On one corner cut out a 4 inch square, continue to the next corner and do the same, until you have done all 4 corners.

Using the pins as your cutting guide, cut 1 inch wide strips that are 4 inches long. You can mark your fabric every inch or use a yard stick to see where to cut every inch. I'm good at "eyeballing" it, I might have a few that are wider or skinnier but that's okay too! I cut about 20 strips then tie them in double knots, that way my hands don't get tired as fast.(I have carpal tunnel from cutting hair!) It works for me. Some people might cut the strips all the way around first, or some people might just do one side at a time.
 |
| See my pins? I use them as my guide |
I tie a few on the connecting corner as well, just to make sure it stays straight, and the corner is square.
 |
| Square Corner |

Work your way making double knots all the way around until you are finished. Its really pretty quick.
 |
| Almost done! :) |
I really don't like that it isn't attached in some way in the middle, so I sew one stitch (think quilt) right in the very center. I used a contrasting color that matched the front.

 |
| Can you see the pink string in the center? |
Notes:
*I used 1 yard of each color for this blanket. It was 60 inches wide so it made a pretty big blanket for her, she's only 2.
*For an adult you would probably want to use at least 2 to 2 1/2 yards of each color, depending on the width of your fabric. But you can make it as large, or small as you want. That is the beauty of it, there is no set size.
*Make sure the two fabrics you pick are the same width.
*There are several different ways to tie them, double knots (the way I did them), balloon knots or braided.
 |
| Balloon -(picture from instructables.com) |
 |
| Braided- (picture from helpinglittlehands.blogspot.com) |
And something else I learned...the nice soft silky fleece doesn't work! It rips and falls apart when you try to tie the knots. (-’_'-) Live and learn...


Bella loves her blankie, that her Mimi made for her! ♥ ツ
Just have fun
♥║║
╚══╝

Thanks for posting this and linking to my blog! I'm glad your granddaughter likes her blanket. My kids and cats all love their blankets (and my blanket too - one of my cats has claimed it as his own. lol).
ReplyDeleteYour welcome! & Thank You! :) They are fun to make!
ReplyDeleteI can't wait to try this!! Thank you!!!!!!!
ReplyDeleteDear Anonymous,
DeleteYour welcome! You will want to make more than one ;)
They are fun to make!
Hi! Wandered in from just searching for recipes, but found this awesome tutorial! My son was given a similar blanket when he was an infant and we still use it today because it's so warm (he's now a toddler). I've been meaning to make something similar for my friends and their babies so I'm so glad I saw this tutorial!
ReplyDeleteI'm glad to hear they hold up so well!! Everyone I made them for really loves their's, I still need to make a few more, I'm going to try a different way to tie them, I don't think I have it pictured above, but I think I have it pinned in Pintrest, not sure. I need to look.
DeleteGlad you enjoyed the tutorial, and thanks for stopping in, and making a comment! :)