Blogger Widgets

Thursday, February 28, 2013

Spring Fever - Winter-Sowing Seeds - Outdoors


So ..... I have Spring Fever, really bad, and I'm missing my flowers that I haven't been able to plant for about two years! I have had a few plants outside but not my usual abundance of flowers, flower beds or planters!! I did relocated some bulbs, but those may take awhile to come back and get full! I think they have been where they were without any flower production for years.. Hopefully they will bloom again. 
I plan on doing a lot of planters & containers this year, as we haven't  got our flower beds in yet, and I don't want anything permanent. I like to use weed block & natural colored pea gravel as my mulch (see pics below) because you don't have to replace it every year, heck, you don't have to replace it for a long time, and you only have to add to what you already have, also it doesn't attract insects (like termites! Eeekk) I think I'll be getting the white and tan pea gravel this time around? Maybe I should try to find a red-ish colored pea gravel? That might be best as the clay soil around here tends to be on the red side.... I don't even know of a place around here to get landscape gravel...enough about the pea gravel, that's not what this post is about!   


Front Yard at my old house in Ohio with the pea gravel beds ....miss my bulbs ♥  :(
Pea Gravel I used as mulch.
Ohio - Pea Gravel in flower beds
Winter Seed Sowing, is what today's post is about. 
I saw a great posts about it Here, that I wanted to try. He has a lot of good info on his site!! He also has a good article on What to Winter Sow..and When but keep in mind, he lives in zone 5-b.


We go through a lot of milk and vinegar around here. (I know they go great together - yuck!) I had a whole long row of em' ready to take to the trash, then saw the post on bottle greenhouses, and changed my mind and thought, why not use the jugs for something that is constructive and that I love? Glad we didn't throw them away after all!!


Mini Greenhouses
I live in zone 8a (light tan on map) so its okay for me to start my seeds now but I will wait a little while before I start my veggies. If you live in a colder zone, you can start yours also. Some seeds you can start as early as January! Seeds get "hardened off" when they grow outside, and its more like the natural process.
You can find your zone on the USDA Plant Hardiness Map below. 
They have added "a" and "b"  to the zones so yours might have changed if you haven't looked recently, and they have also added a zone 12 and 13.  If you are having problems seeing it, you can go to their site and view it or download your own copy. http://planthardiness.ars.usda.gov/PHZMWeb/Default.aspx


Click on this picture and it will get a little bigger

These mini greenhouse's don't need any special lighting or temperature requirements. Winter-sown seeds grow to be sturdy plants that are stronger than indoor sown plants.


Cut you jugs about 3/4 of the way around, leaving a "hinge"


Poke or drill about 8-10 holes in the bottom.(I had to poke, my husband took the drill on a job) Poke a few around the bottom sides, I used a coffee filter in the bottom so the soil stays in the pot. See my post on "Keeping Soil in your Flower Pots" 


Add  a good quality soil (about 2-3 inches) tamp it down and add more if you need it. Water it in, let it drain thoroughly then poke  shallow holes in the soil, and plant your seeds, lightly cover with soil. The teeny tiny ones can just lay on top of the soil, no need to cover them up.


After I added my seeds, I used a squirt bottle to mist them. So it didn't disturb the seeds.

Close up the jug and tape it. (I taped mine all the way around, you don't have to, as it gives it a little more ventilation, and as I found out later you will need to open them up when it gets warmer, sooooo, don't do what I do, do as I say He he he ...one piece of tape is sufficient ) Label your greenhouse with what you planted and the date. You can throw away the lids, you won't need them! The top needs to be open for rain, snow, sleet and sun! It also needs to be open for ventilation, it lets out excess heat and humidity.
Take them outside. I put mine in the wheel barrow so I can move them  easily.

That's it, that's all you have to do! Wait for them to sprout and grow.


I also bought some Seed starting fiber cells, I wanted to have single plantings to fill my hanging bags easier. (see more about the Seed Starter Cells down below)


Hanging Flower Bags with Impatiens @ my old house.
Hanging Flower Bags
When the weather starts getting warm in the day, but still freezing at night, your seedlings will begin to show themselves. Keep a tab on the moisture (if it doesn't rain or snow) and gently water them so as to not disturb the seeds. I used a squirt bottle to moisten the soil and it doesn't hurt them. Making sure not to let the soil dry. On warm sunny days once the sprouts come up, you can leave the tops off so they can get some sun, and fresh air, making sure to close them up again when the sun goes down. 


I planted mine on Feb. 18 2013, I checked them yesterday (Feb.26th) but not to thoroughly, it was kind of a crappy day out, so I didn't really linger.... But today (Feb. 27 th)  the sun is out so I checked them a little more thoroughly  and a few of the seedlings are showing themselves!!!!! Yea!!!! It's a lot quicker than I thought! I see the Marigolds, the Bachelors Buttons, and a few of the Coleus. I'm so Happy!! They started sprouting before I even got this post published! 


Seedlings!! :)
I haven't planted all the seeds I want to start yet, I still need to find a few certain seeds, and the vegetables I'll start later, maybe mid March...I have to get used to the growing season starting early here! I never bought my plants till Mothers Day in Ohio. 


Under the Maple Tree @ my old house :) 
Advantages of Winter Sowing:
These mini greenhouse's don't need any special lighting or temperature requirements. 
* Can start early with minimal effort & maximum gain.
* Indoor germinated seedlings, tend to be  frail and more tender, winter-sown seeds grow to be sturdy plants that are stronger than indoor sown plants.
*Doesn't take up space indoors.

Location:
* Make sure its safe from wind, so your greenhouses don't get tipped over, but where the sun, rain & snow (if you have any) can get to them.
* If you have pets (male ones especially) you might want them up off of the ground.    


The Waiting Begins:
As the weather warms and freezes, your seeds will freeze and thaw, which creates the natural action of opening up the seed shell.  This is good for the hard shelled seeds such as Morning Glory's, Cannas  Nasturtiums, etc., it cracks the shell so there is no need to pre-soak. 
Check on your greenhouses occasionally to make sure they don't dry out to much.

Here are the Seed Starting Fiber Cells, I put them in a drawer of a plastic bin, you need to drill holes in the bottom of the plastic for drainage. I planted Petunia's & Impatiens in these cells.


Petunia & Impatiens Seed Cells
I taped 3 opaque trash bags together. 


Taped it onto the plastic drawer, all the way around and cut out a ventilation/ watering hole. I Poked  more holes all around the edges of the trash bags for more ventilation.


 This is my 3 gallon planter. I taped a couple bags together and covered the top. I can flip the sides up for ventilation. I un-tape it to water.  I planted 3 different colors (Purple, Pink & Blue) of Morning Glory in this so I can set it on my porch. I got this idea from a Pin, on Pintrest. (See below)
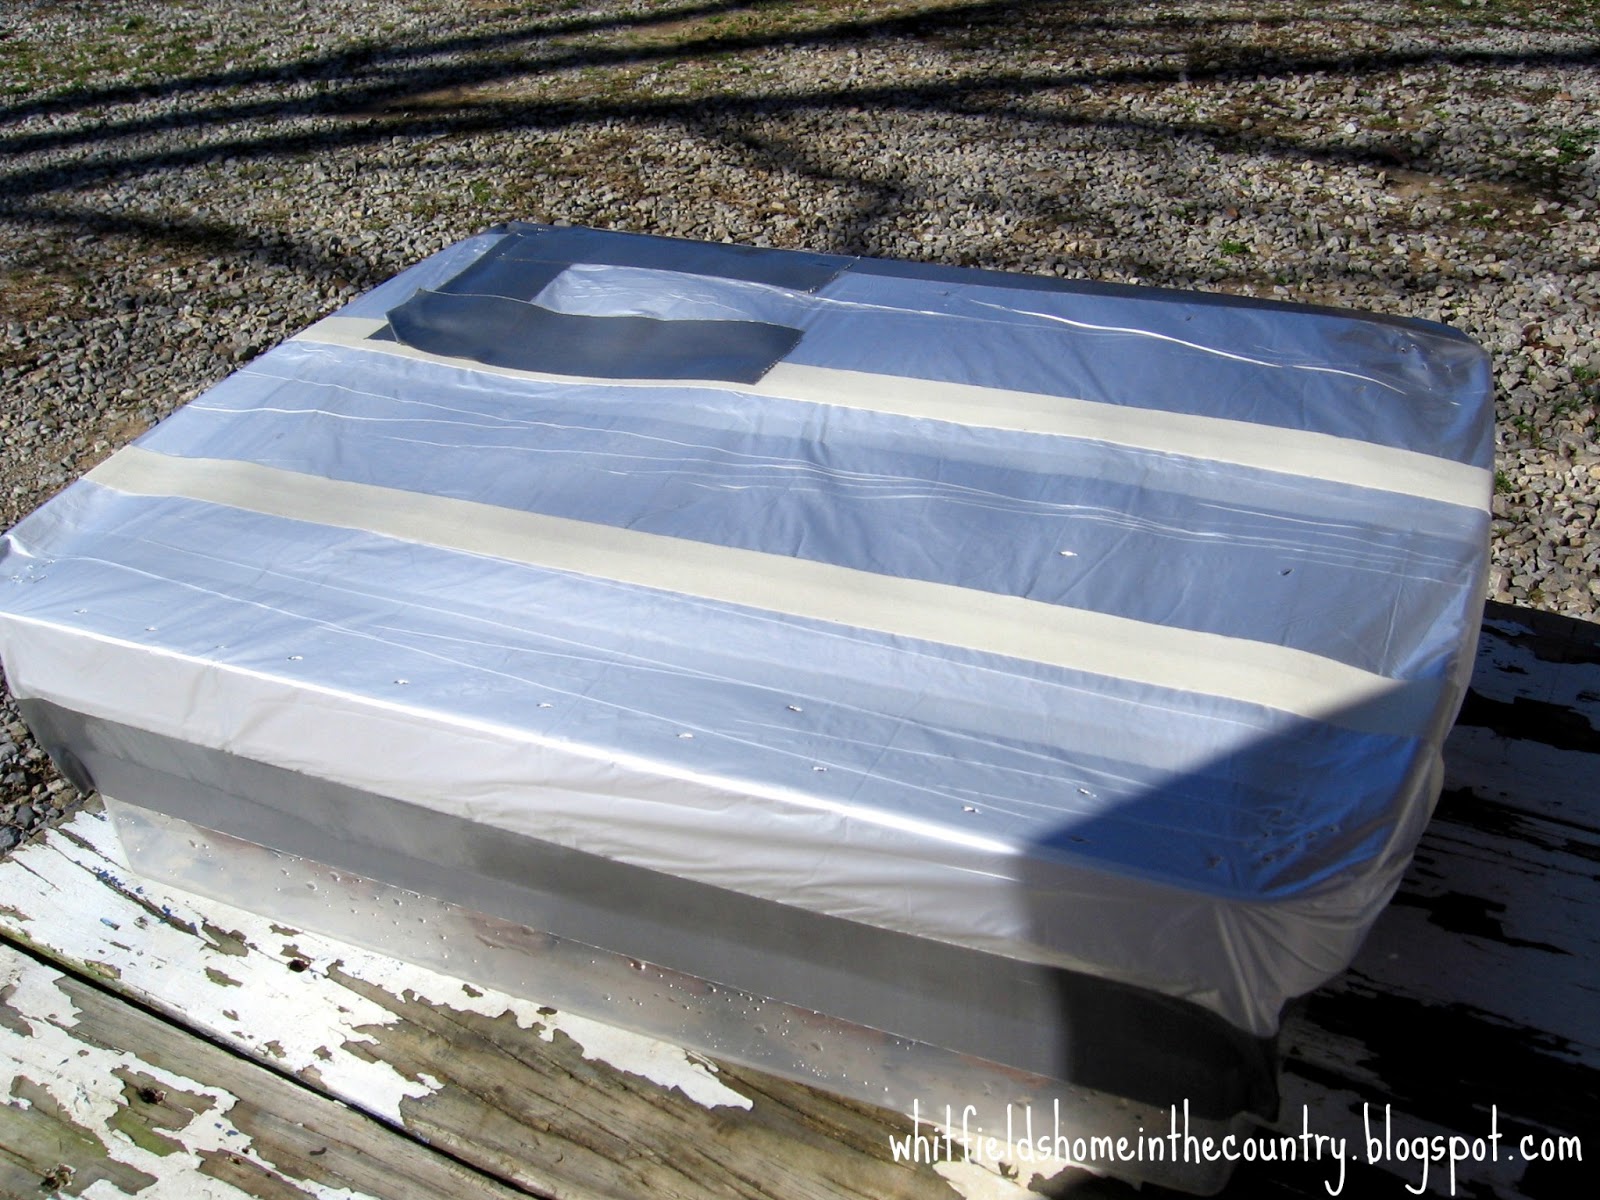
3 Gal. planter with Morning Glory's
Pin from Pintrest.... GOOD IDEA!


I will update this post with the progress of my plants, and keep it updated with pictures etc., so stay tuned!


Update 3-8-13  I see some Lobelia coming up today :) (in both containers) I didn't take a picture as they are barely big enough for my eye to see.
I still don't see any Coleus, or the Morning Glory's.

Yesterday (3-7-13) I planted some more Bachelors Buttons and some pink and blue Forget-Me-Nots..... I'll keep you posted.

Update 3-25-13


The Morning Glory's are finally up and about a inch tall, I didn't take a picture of those yet. I see the Petunia's coming up now but are tiny. I still don't see the Impatiens (I'm getting very impatient for them hehehe) I planted some more, hopefully they aren't duds!Also, Last week I planted:
Convolvulus (I don't even know how to pronounce that, but they sure are pretty!! LOL)
Alyssum (white & purple), Mammoth Sunflowers, Beefsteak Tomatoes, Super Sweet 100 Cherry Tomatoes.
the Convolvulus and the tomatoes are already starting to come up :))


Are you going to try this out? If so, what will you plant? Leave a comment and let us know!

UPDATE 5-2-13
These pictures were taken on 4-23-13
Bachelors Buttons

Marigolds

Lobelia
 These pictures are after I transplanted them to my washtub barrels. I did have to buy a few plants this year, I didn't have 100% success on the seeds I planted, I'll try again next year! I would say I had a 95% success rate, so its worth it to me to do this again!!

Transplanted Lobelia 4-26-13

Transplanted Bachelors Buttons 4-26-13

Transplanted Marigold's 4-26-13
These are my finished barrels...I'll post pics when they fill in more.
4-26-13
4-26-13


This should help with my Spring Fever!!

Happy Planting!!


Wednesday, February 27, 2013

Whitfield's Home ♥ 1st Birthday


Happy Birthday! ( a little late!! )


Thanks for following along, its been fun!!

If you haven't subscribed yet,what are you waiting for? lol


Monday, February 11, 2013

Valentine's Chocolate Bark


I thought this would make another nice post for Valentines! I adapted the recipe a little bit, but got it from here
If you like white chocolate or maybe your kids or Sweetheart does (like mine )  Then this post is for you.  

This is a easy and quick recipe. I changed it up a little bit to use what I had on hand, and it still worked out good! 


I have a couple of tips after the recipe so be sure to look ..... learn from me ツ 


Here is what you need:

I used Nestle's Milk Chocolate,Chocolate Morsels (either semi sweet or milk choc.) The Chocolate Candy Melts were recommended, You can buy them at Walmart.
I used Nestle's White Chocolate Morsels. The White Candy Melts were recommended, you can but them at Walmart also.
I used about  1/4 of a bar of Paraffin, split between the two chocolates (see Figure 1, below )
I used Gel Food Coloring. Recommended was a oil based food coloring I found this on Wilton's site. I don't know if you can get these at Walmart or not?

Sprinkles
M & M's (Valentine M & M's) I just had regular M & M's, so I picked out just the red ones 
Parchment Paper

I used a  9 x 13 cookie sheet, but you could double the recipe and use a normal size cookie sheet.


(Figure 1)  -- cut off 1/4 block of Paraffin
Line your cookie sheet with parchment paper and put it aside.

In a double broiler (I just use two pans,1 bigger, 1 smaller) melt the chocolate morsels and half of the wax. (you can microwave to melt, but I prefer to use the double broiler,if you choose to do it the microwave, make sure not to burn the chocolate) check and stir it often.
Once all of it is melted and smooth, pour into the lined cookie sheet and spread it thin with either a spatula or a rubber bowl scraper.


After its spread out in a thin layer place it in the refrigerator until set (about 15 to 30 min.) Meanwhile...after at least 15 min. has gone by, start melting your White Chocolate Morsels,Wax and Food Coloring.


Once melted and smooth, pour it onto the chocolate layer and spread it out to cover chocolate layer.  Add your M & M's and your sprinkles.


Return the cookie sheet to the refrigerator and let it set another 15 to 30 min.Once its set, break into pieces. 


Tips:
* Press your M &M's in a little bit, mine were  popping out when I was breaking up the bark. Same with the sprinkles. Kinda throw your sprinkles at it so it digs in deeper! lol

* Oil based food coloring is recommended, but I used the Betty Crocker  Neon Gel and it worked okay, it looked a little polka dottie :) and maybe didn't blend in together as well as the oil based? You can't tell on the finished Candy though, so that's good!


Happy Valentines Day!!
♥║║
╚══╝

Ps. This could be used for any occasion, just change the color of the food coloring! 


Thursday, February 7, 2013

Sugar Cookie Squares


Just in time for Valentines Day....
If you have a sweetie, that loves sweets, then make these Sugar Cookie Squares for them (Or for yourself)   They are much simpler than cut outs, and you don't have to frost them individually! How simple is that?
These cookies are like the ones you see in the store, you know the ones, there are about 8 round, colorful, frosted and sprinkled cookies in the little clear plastic container....and they cost about 4 bucks!  So, If you like those cookies, you will LOVE these!!  I found the recipe on Pinterest (of coarse) and you can find the link to the original site here

These are thick, soft and moist and will definitely satisfy any sweet tooth you may have..

I made a couple batches at Christmas and gave them out as gifts, needless to say, they were a hit!
I'll have pictures of those at the end of this post. 
So these cookie squares aren't just for holidays, they are perfect for any occasion, classroom treats or bake sales, baby showers, parties etc...


Here is what you need:

1/2 cup Butter, softened
1 cup Granulated Sugar
1 Egg
1 Egg white
1  Tbsp Sour Cream 
1 tsp Vanilla 
2 1/2 Cups All-Purpose Flour
1/2 tsp Baking Powder
1/2 tsp Salt


Preheat oven to 375 degrees. Butter a 13" x 9" pan, set it aside.
In a  bowl combine flour, baking powder and salt, set it aside. 


In the bowl, whip together with a mixer, butter and sugar until fluffy about 3-4 minutes. 


Stir in egg and egg white. Add sour cream and vanilla and mix until blended. 


Slowly add dry mixture and stir until well combine. 


With buttered hands, gently pat mixture into buttered 13x9 pan. 


Bake 17 - 20 minutes until toothpick inserted into the center comes out clean and edges are lightly golden.
Cool completely,
Frost. (Vanilla Frosting Following)


Vanilla Frosting:


Here is what you need:


1/4 cup Unsalted Butter, softened
2 Cups Powdered Sugar
2-3 Tbsp Half and Half
1/2 tsp Vanilla
Pinch of Salt
Sprinkles
desired amount Food Coloring 


In a  bowl, using an electric mixer, whip together butter and powdered sugar and half and half until fluffy. 


Stir in vanilla and salt. 


Once its well mixed, At this point, I spooned out about 2 Tablespoons of the white frosting and put it in a sandwich baggie (I don't have a frosting bag) to pipe the lines on.


Add desired amount of food coloring and mix until well blended. (I used about a 1/4 inch line of the gel food coloring)


I think these are to cute to eat!!   Just kidding   Yum!
Enjoy your cookies...

Here are the ones I made for Christmas ( I know they aren't really Christmas colors, but what can I say.)


I just have to take a minute and brag on my husband... 
I needed a mixer, and things were tight at Christmas, so he bought me a cheap hand mixer from the dollar store to use. Well, the mixer kept falling over, and would not stand up!! Especially if there was something on the beaters Grrrr!
So, I complained  
¯\(°_o)/¯ Lol ...so he made me a stand out of pvc to hold my mixer. Thank You Honey!


He is so good!! 

♥║║
╚══╝


Total Pageviews

Related Posts Plugin for WordPress, Blogger...